

My truck had a 1967 steering column in it when I got it. It was damaged and needed replacing. I easily found another column of the same year instead of a proper 1966. At the time, I could not find the adapter to adapt 1967 column wiring to 1966 body harness wiring. Not a problem. I made my own using 1/4″ female spade connectors.
As a plus, the 1967 column also include hazard light switch which was not original on the 1966. This means it also has the extra wiring in the column for the hazard light. The brown wire for the hazards has been extended and connects to a simple flasher circuit on the new fuse block.

The original fuse block in the truck was in about the same condition as many other 54 year old trucks might be. Rusted and corroded. So I updated to a new fuse bade type block,
See this post for the original fuse block replacement: New fuse block installed

The original wiring had some other woes to deal with as well. Some frayed, broken and missing wiring to lights and some light fixtures needed some love.
I chose to modify an OEM GM LS truck engine wiring harness for my purposes. Removing some sensor and other wiring that was not needed. This modification of the LS wiring harness has been covered in many YouTube videos and LT1swap.com. So I won’t cover those details. Anyone attempting to do this modification should most definitely read and re-read Brendan Patten’s LT1swap.com. There is no better source on the internet than his website. I also suggest watching UCanDoIt2 on YouTube. He takes the LT1swap info and with some tips makes it very easy to understand.

I used a different and better fuse block on this harness than previous. This fuse block is waterproof and dustproof with a nice cover.
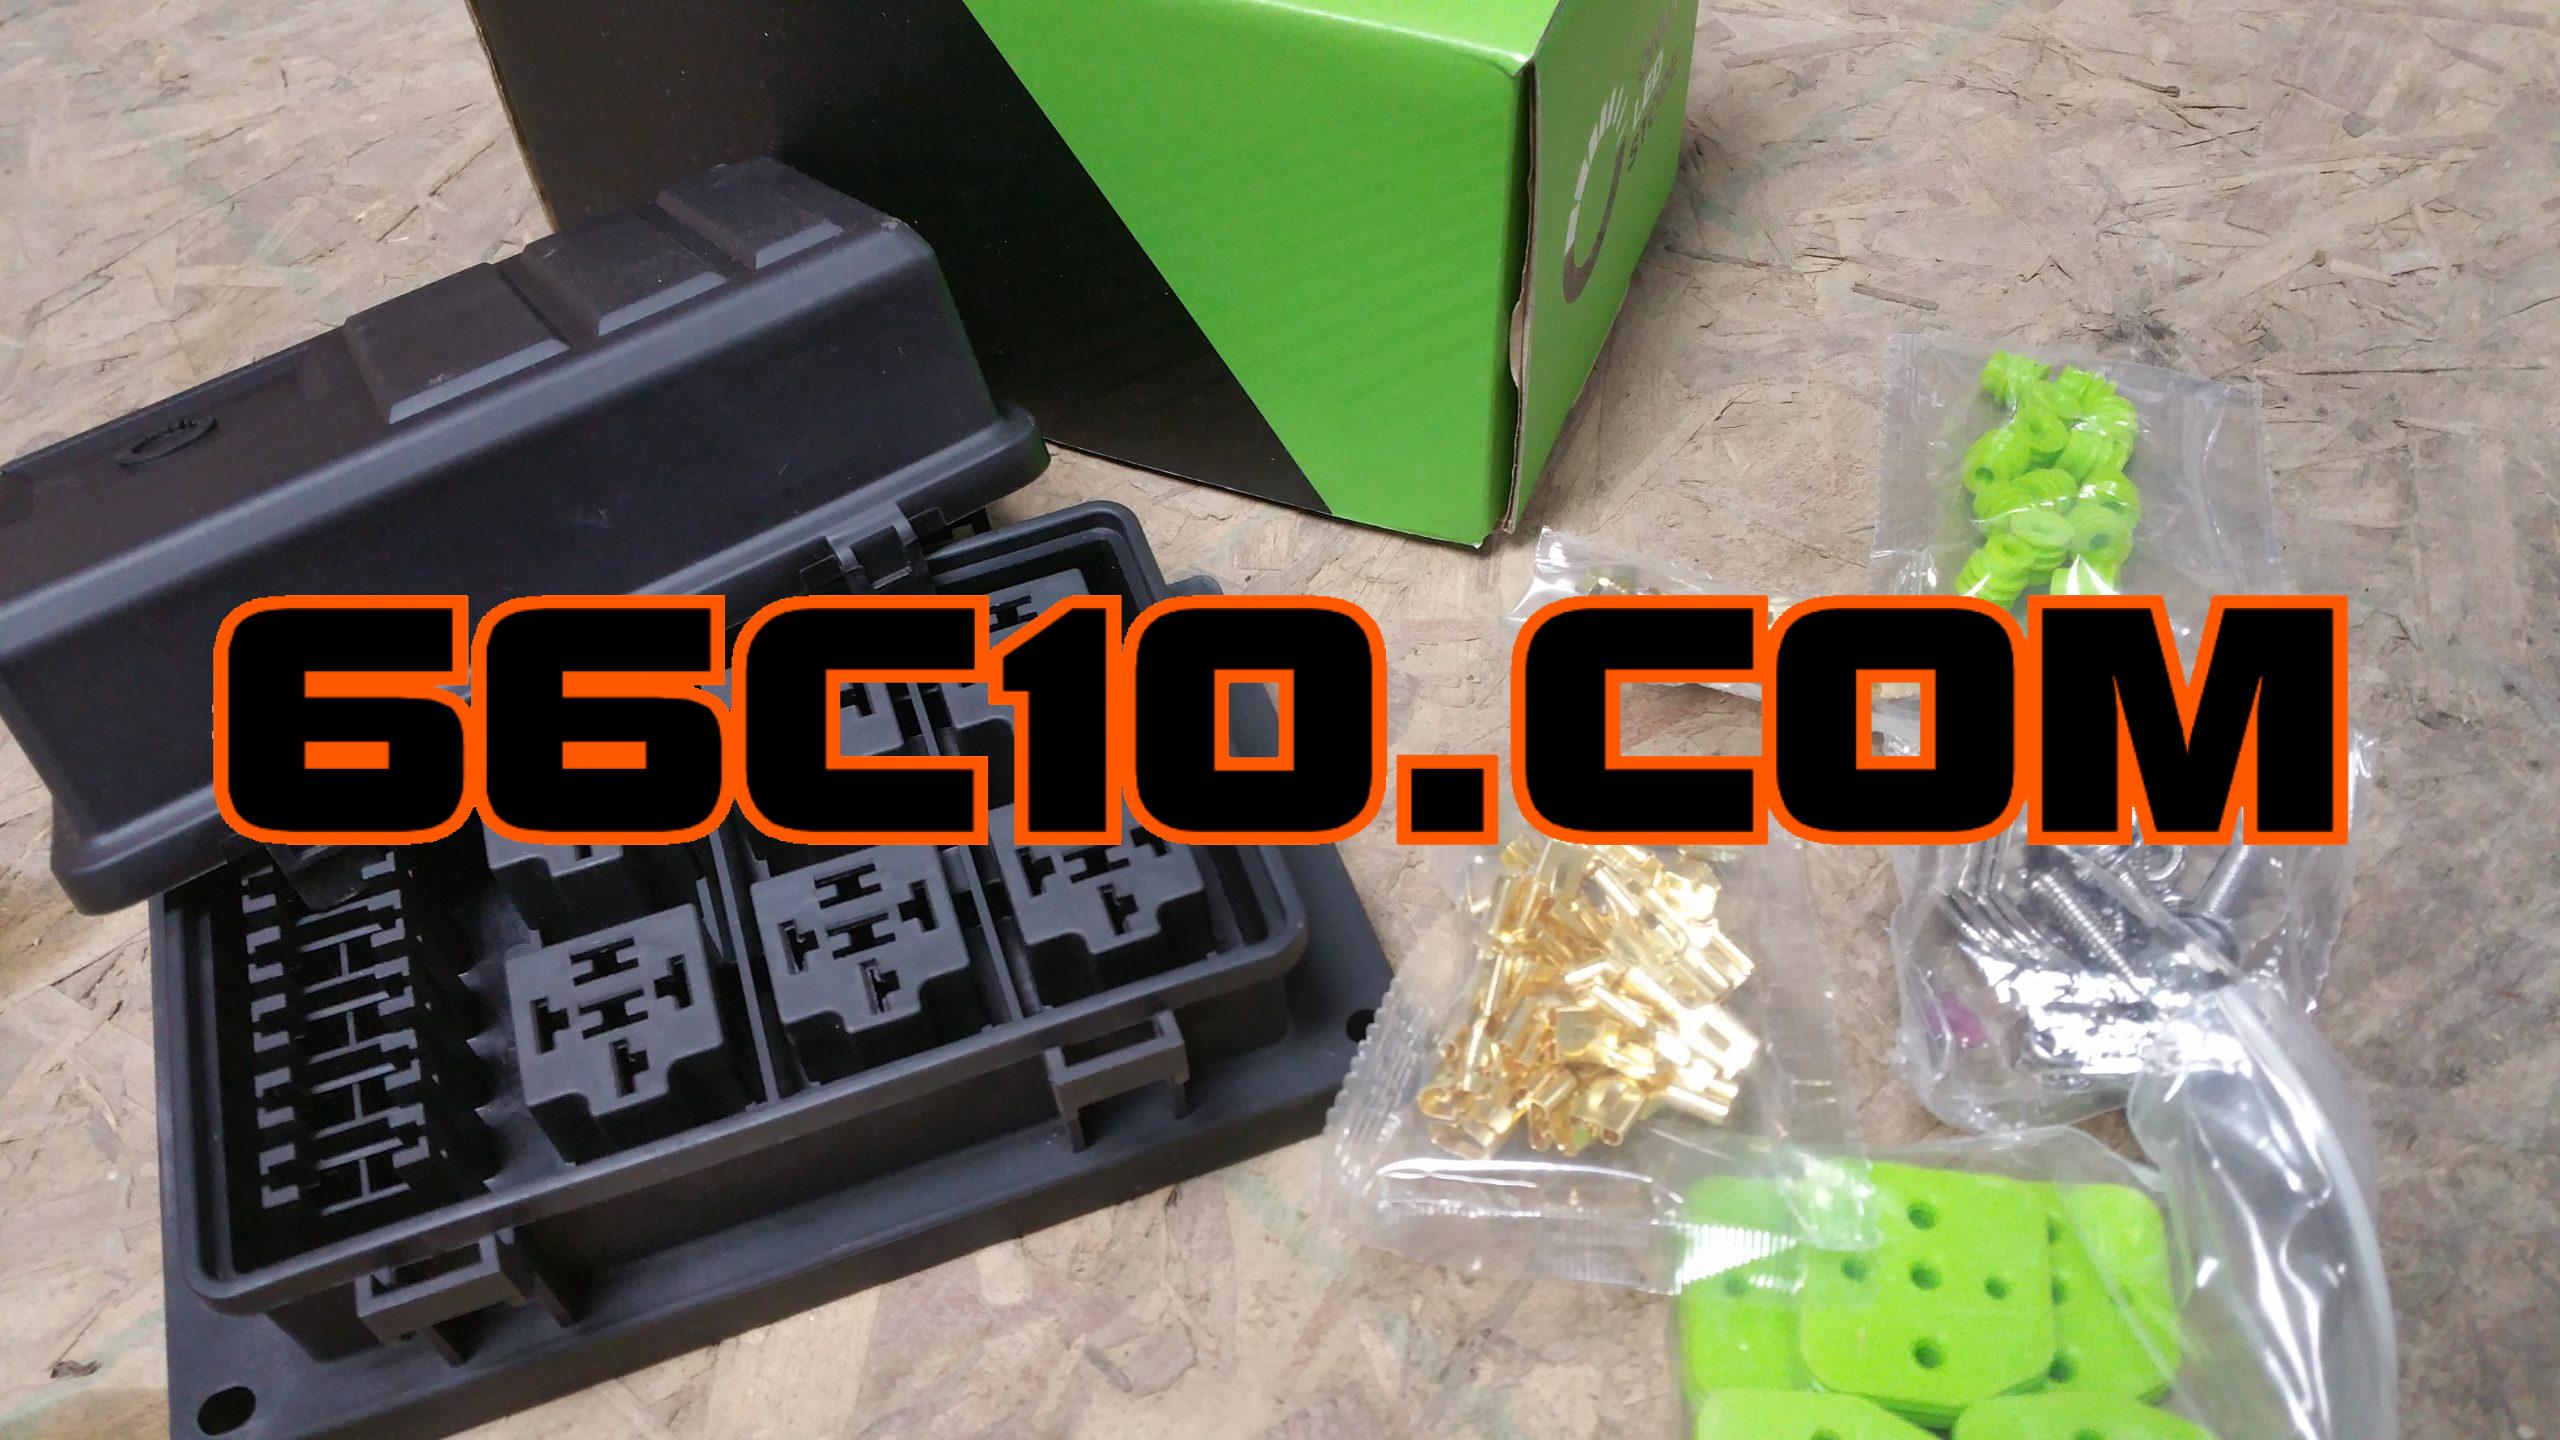
Figuring the LS fuse block was simple. Since I had done this once before it was just a “what can I do better this time” situation. The previous one I built for the ’79 wagon has worked great with no problems. So I just made a few changes, firstly by using a better fuse block as I mentioned.
I split it up into 6 circuits with three relays.
- Fuse 1 – Electric Fan – 30A
- Fuse 2 – Fuel Pump – 20A
- Fuse 3 – Coils & ECU – 15A
- Fuse 4 – Injectors – 10A
- Fuse 5 – O2, MAF, MIL – 10A
- Fuse 6 – Transmission and TAC – 10A
A 12v positive from the ignition key switch sends power to the main relay which then powers circuits 3, 4, 5, and 6.
The electric fan and fuel pump relays get 12v battery positive, but are only activated by a ground signal from the ECU when necessary. This could also be 12v positive ignition power also since the fan or pump will not operate without the ECU calling for them anyway, but I chose to keep them on battery power.
If two fans or a single 2-speed fan is used, then a second fused relay should be used. The ECU has provisions for two fans but this must be wired in appropriately when modifying the harness and activated in the ECU tune.

Some of the wiring from the ECU need to go into the cab. Gauges , MIL and OBD2 signals needed to go in as well as some wiring needing to come out such as 12v+ ignition an brake signal. I also chose to bring the original starter wire back to the corresponding starter wire in the harness instead of straight to the starter.
To keep this wiring simple and neat and to make later integration or repair/removal much simpler, I added a waterproof plug connection. As diagramed below.

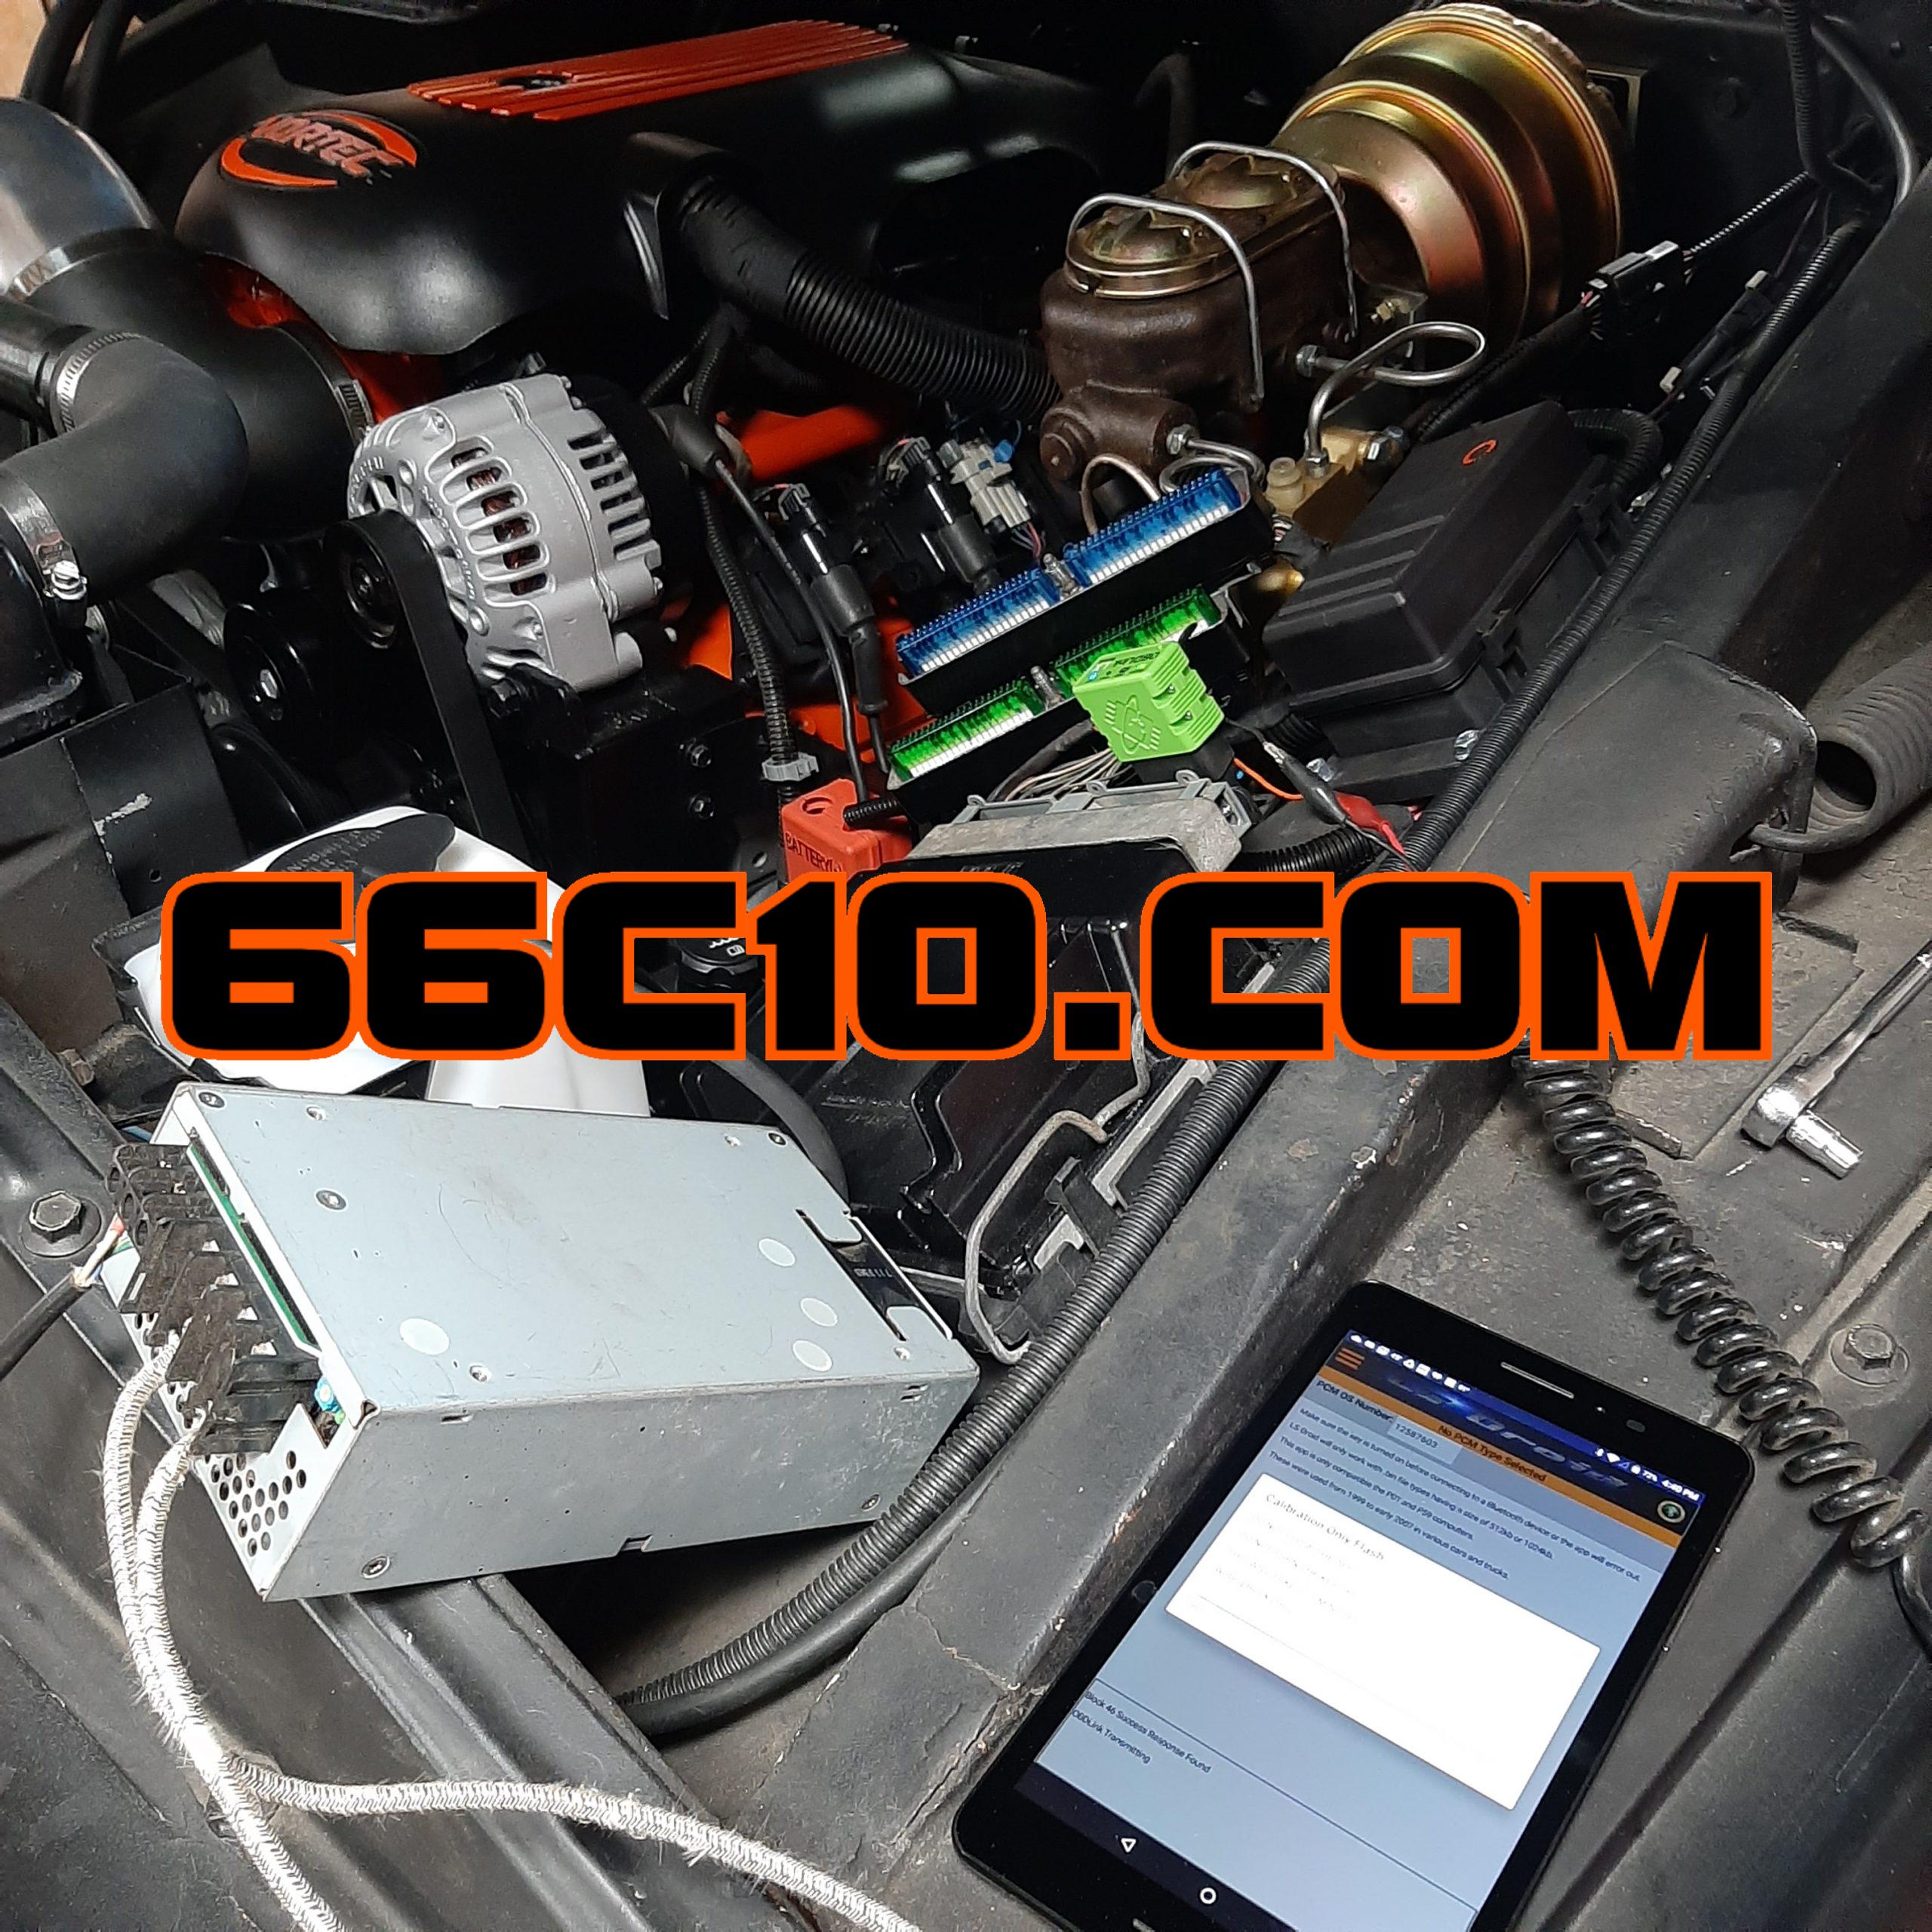
Along with the dash cluster install the ODB II port was installed under the dash since it was in the same harness coming in from under the hood.


See this post for info about the digital media receiver install: Simple tunes install