


Of the two lights, one still has the socket while the other is completely gone. Some light surface rust on each was easily removed with a wire brush.


Checking further, the one “good” light housing with the socket still attached had a grounding issue. Although it looked in good condition, the years had brought some corrosion between the socket and the metal housing which when fastened in place to the bed created the ground connection needed.
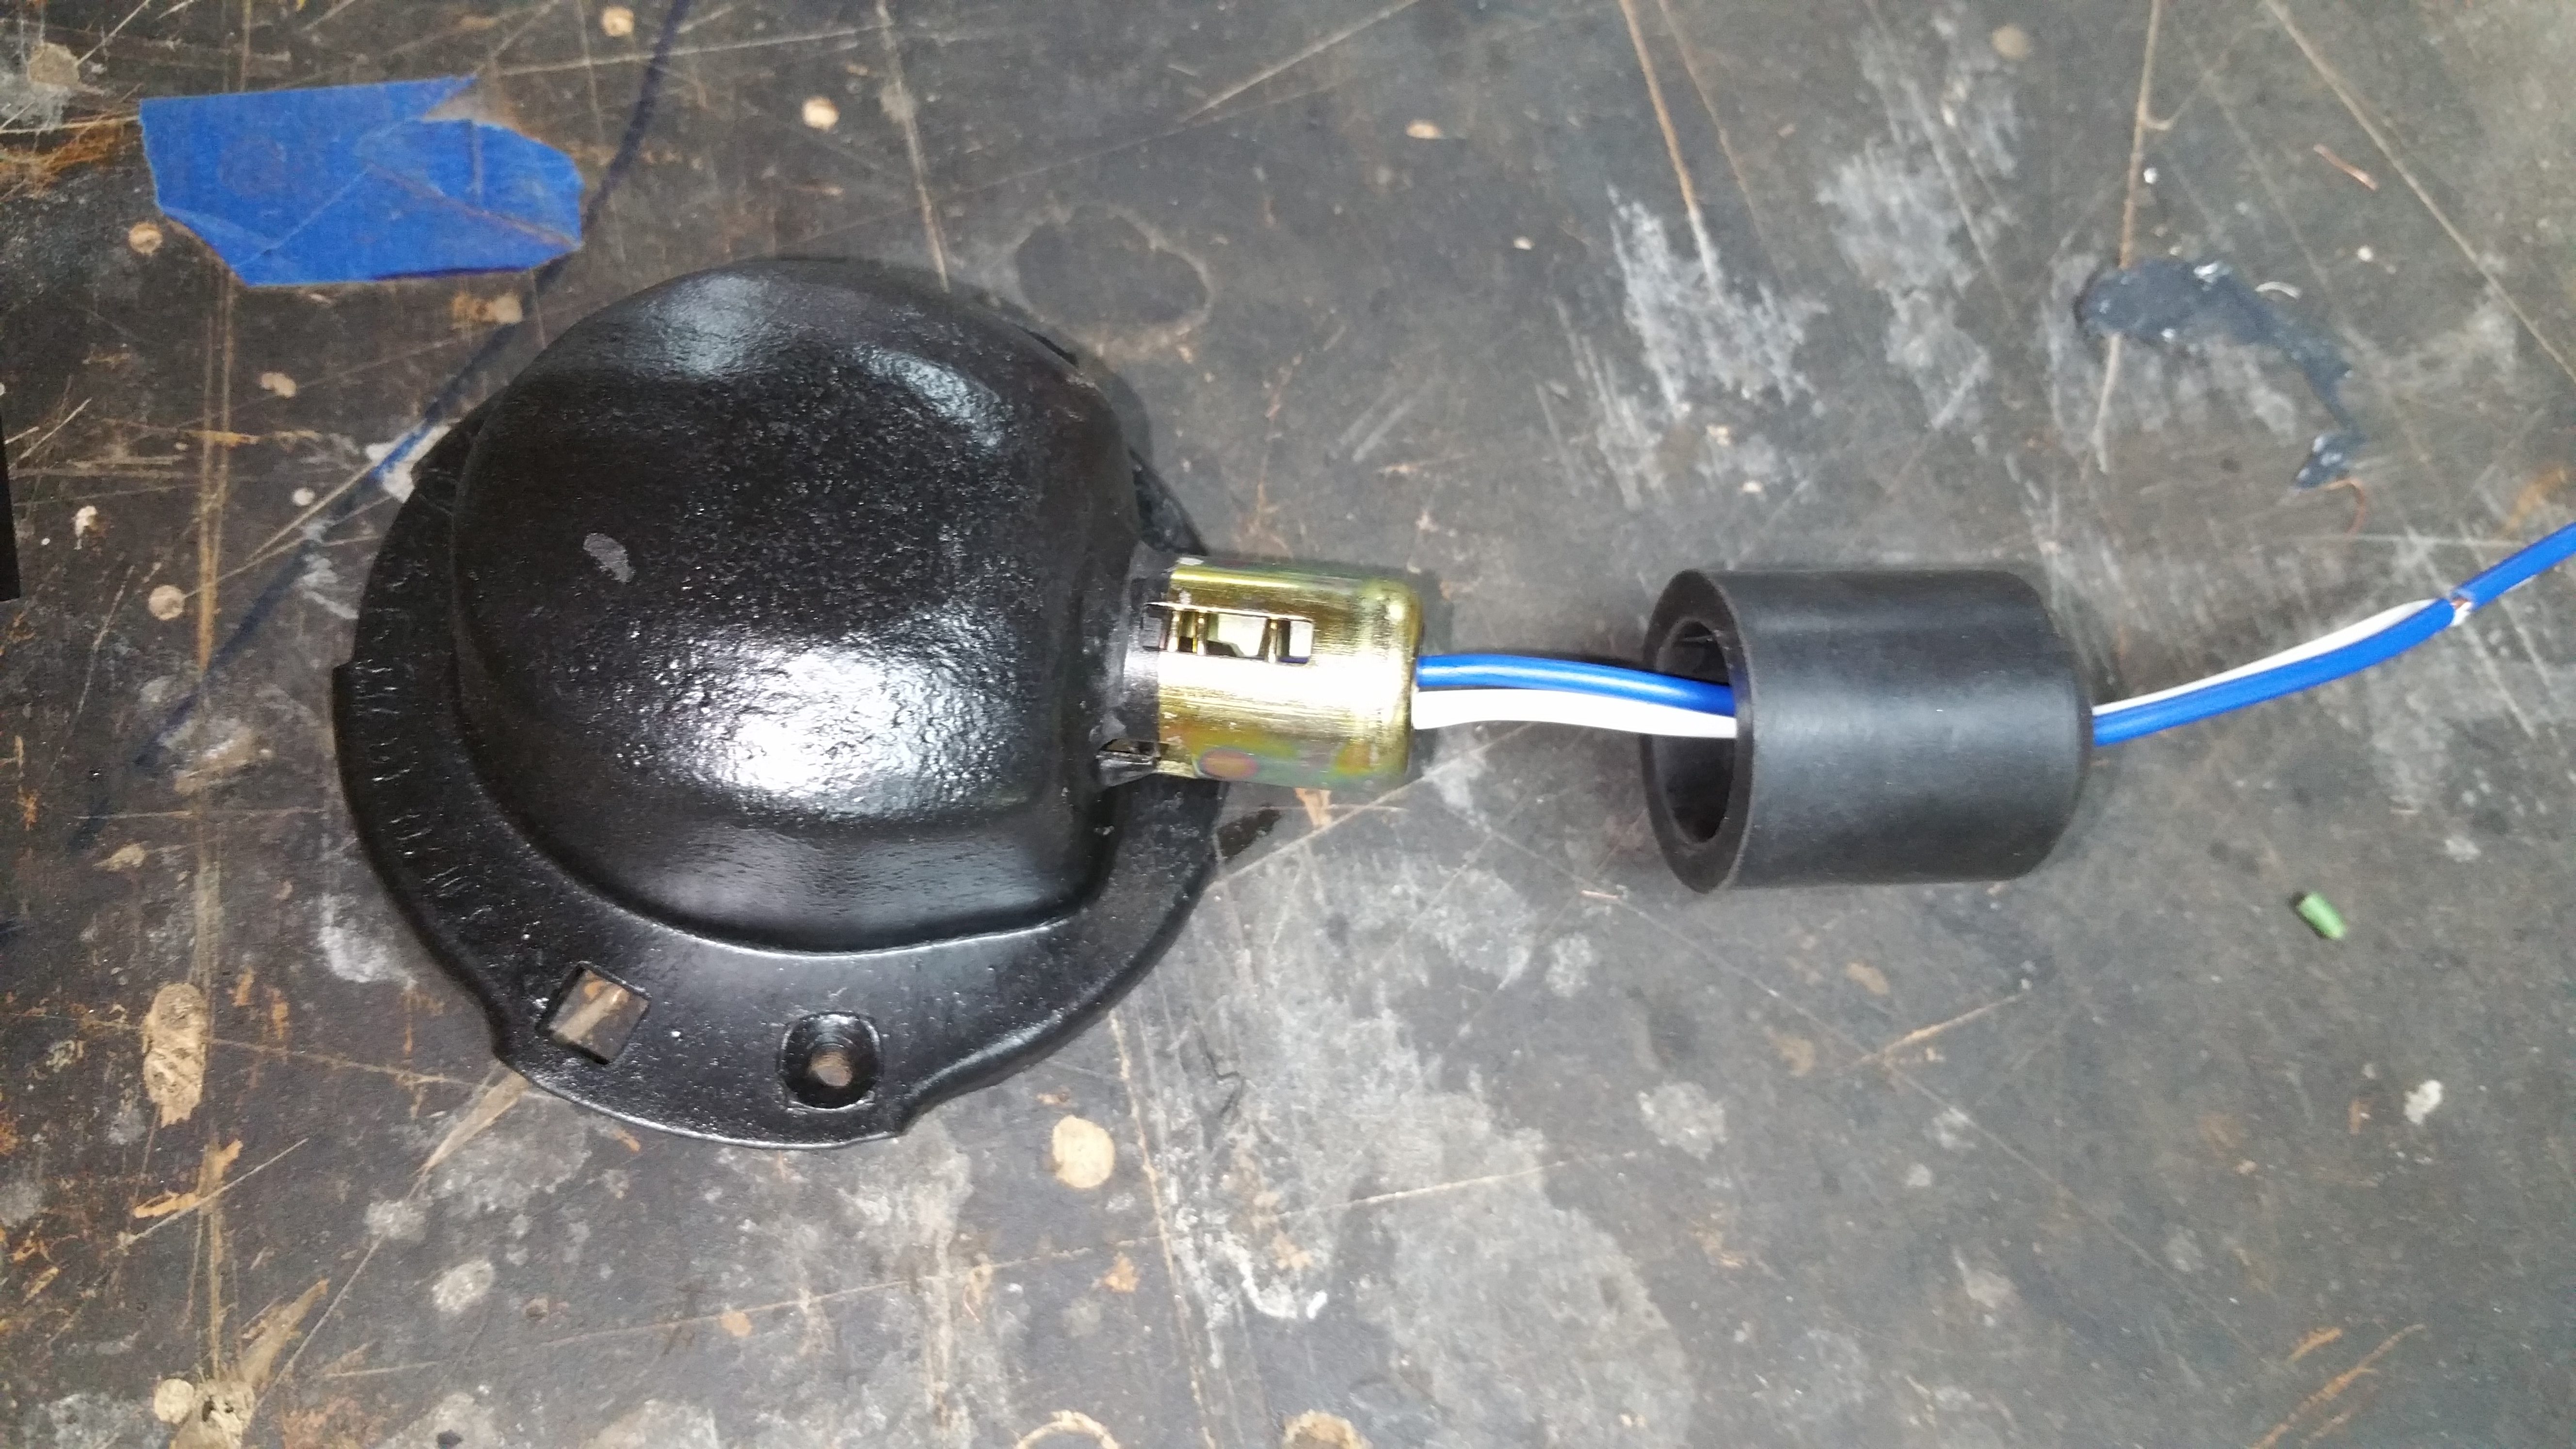
I used an aftermarket 1156 socket to rebuild the first light before making any damaging changes to the complete housing. The metal of both the light housing and socket are too thin for welding and I have no other way to attach them together other than good ol’ JB Weld. I rigged up a jig to hold each piece in place while the epoxy had time to set. The JB Weld does not allow a continuity connection to the housing so the ground wire will loop up to the screw connection of the housing to the body. A rubber 3/4″ Heater Bypass Cap (Dorman 493-101) works perfectly for protection and insulation over the socket. It creates a good seal, but I may add sealant around the tot of the cap.

Now that I know this works. I can rebuild the second, complete assembly. I reluctantly ground the crimped lip from the socket holding it together and easily removed the corroded socket. The same process as above was used to complete the rebuild of the final housing.
This mission successfully accomplished.